What is PCBA Visualizer?
PCBA Visualizer is a powerful tool that allows you to visually inspect and analyze printed circuit board assemblies (PCBAs). With PCBA Visualizer, you can:
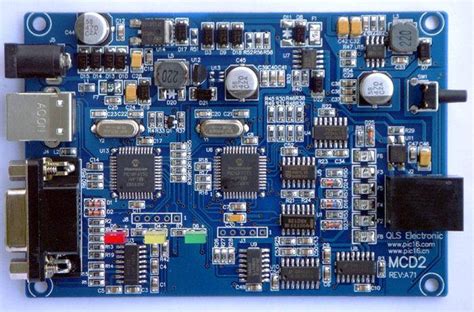
- View high-resolution images of PCBAs from multiple angles
- Zoom in and out to examine specific components and areas of interest
- Measure distances and dimensions on the PCBA
- Annotate and mark up images to document issues or share information
- Compare PCBA images side-by-side to spot differences
- Generate detailed reports of your PCBA analysis
PCBA Visualizer supports a wide range of image formats, including:
| Format | Description |
|---|---|
| JPG | Joint Photographic Experts Group format |
| PNG | Portable Network Graphics format |
| BMP | Bitmap image format |
| TIFF | Tagged Image File Format |
Getting Started with PCBA Visualizer
To start using PCBA Visualizer, follow these steps:
- Download and install the latest version of PCBA Visualizer from the official website.
- Launch PCBA Visualizer.
- Click the “Open Image” button and select the PCBA image you want to analyze.
- Use the toolbar buttons and menu options to zoom, measure, annotate, and analyze the PCBA image.
PCBA Visualizer Toolbar
The PCBA Visualizer toolbar provides quick access to the most commonly used tools and functions:
| Button | Function |
|---|---|
| Open | Open a PCBA image file |
| Save | Save the current PCBA image and annotations |
| Zoom In | Zoom in on the PCBA image |
| Zoom Out | Zoom out on the PCBA image |
| Measure | Measure distances and dimensions on the PCBA |
| Annotate | Add text, lines, arrows, and shapes to the PCBA image |
| Compare | Compare two PCBA images side-by-side |
| Report | Generate a report of your PCBA analysis |

Analyzing PCBAs with PCBA Visualizer
Zooming and Panning
To zoom in on a specific area of the PCBA image:
- Click the Zoom In button on the toolbar.
- Click and drag to select the area you want to zoom in on.
- Release the mouse button to zoom in.
You can also use the mouse wheel to quickly zoom in and out. To pan around the zoomed-in image, click and drag the image.
Taking Measurements
PCBA Visualizer allows you to easily measure distances and dimensions on the PCBA image. To take a measurement:
- Click the Measure button on the toolbar.
- Click the starting point of your measurement on the PCBA image.
- Click the ending point of your measurement.
- The distance will be displayed in the Measurements panel.
You can take multiple measurements on the same image. Each measurement will be listed in the Measurements panel.
Annotating Images
Annotations allow you to mark up PCBA images to document issues, add notes, or highlight areas of interest. To add an annotation:
- Click the Annotate button on the toolbar.
- Select the type of annotation you want to add (text, line, arrow, rectangle, circle).
- Click and drag on the PCBA image to add the annotation.
- Customize the appearance of the annotation using the options in the Annotation panel.
Comparing Images
PCBA Visualizer allows you to compare two PCBA images side-by-side to spot differences or changes. To compare two images:
- Click the Compare button on the toolbar.
- Select the two PCBA images you want to compare.
- Use the synchronization options to align the images.
- Examine the images to spot any differences or changes.
Generating Reports
After completing your PCBA analysis, you can generate a detailed report documenting your findings. To generate a report:
- Click the Report button on the toolbar.
- Select the information you want to include in the report (measurements, annotations, comparison results).
- Choose a report template or customize your own.
- Click Generate Report to create the report file.

Advanced Features
Customizing Appearance
PCBA Visualizer allows you to customize the appearance of the interface and PCBA images to suit your preferences. To access the appearance settings:
- Click the Settings button on the toolbar.
- Select the Appearance tab.
- Adjust the settings for background color, highlight color, font size, etc.
- Click Apply to save your changes.
Keyboard Shortcuts
PCBA Visualizer includes a number of keyboard shortcuts to streamline your workflow:
| Shortcut | Function |
|---|---|
| Ctrl+O | Open a PCBA image |
| Ctrl+S | Save the current image and annotations |
| Ctrl++ (Plus) | Zoom in |
| Ctrl+- (Minus) | Zoom out |
| Ctrl+0 | Reset zoom level |
| Ctrl+M | Activate Measure tool |
| Ctrl+A | Activate Annotate tool |
| Ctrl+R | Generate report |

Frequently Asked Questions (FAQ)
What image formats does PCBA Visualizer support?
PCBA Visualizer supports JPG, PNG, BMP, and TIFF formats for PCBA images.
Can I save my annotations and measurements?
Yes, when you save the PCBA image, any annotations and measurements you’ve added will be saved as well. You can reload the annotated image later to continue your analysis.
How do I calibrate the measurement tool?
To calibrate the measurement tool, you’ll need to specify a known distance on the PCBA image. Follow these steps:
- Click the Measure button on the toolbar.
- Right-click on the PCBA image and select Calibrate.
- Click the two points representing the known distance.
- Enter the actual distance value and unit.
- Click OK to apply the calibration.
Can I customize the report templates?
Yes, PCBA Visualizer allows you to fully customize the report templates to include your own logo, color scheme, and layout. Refer to the Report Settings section of the user guide for detailed instructions.
Is there a way to automate PCBA analysis tasks?
PCBA Visualizer includes a macro recorder and editor that lets you automate repetitive analysis tasks. You can record a sequence of actions and save it as a macro, then run the macro on other PCBA images to replicate the analysis. See the Macros section of the user guide to learn more.
Conclusion
PCBA Visualizer is a comprehensive tool for visually inspecting and analyzing printed circuit board assemblies. With its intuitive interface, powerful measurement and annotation capabilities, and customizable reporting, PCBA Visualizer streamlines the PCBA analysis process and helps you document your findings. By following this user guide, you’ll be able to harness the full potential of PCBA Visualizer and gain valuable insights into your PCBAs.


Leave a Reply