Introduction to Microcontroller Circuits
A microcontroller is a small, self-contained computer that is designed to control a specific operation in an embedded system. Microcontrollers are found in a wide range of applications, from household appliances to industrial equipment. They are an essential component in many electronic devices, and understanding how to create a microcontroller circuit board is a valuable skill for anyone interested in electronics.
What is a Microcontroller?
A microcontroller is a single-chip computer that contains a processor, memory, and input/output peripherals. Microcontrollers are designed to be small, low-cost, and low-power, making them ideal for use in embedded systems. They are programmed to perform specific tasks, such as controlling a motor, reading a sensor, or displaying information on a screen.
Types of Microcontrollers
There are many different types of microcontrollers available, each with its own unique features and capabilities. Some of the most popular types of microcontrollers include:
| Microcontroller | Description |
|---|---|
| Arduino | An open-source platform based on the Atmel AVR microcontroller. It is popular among hobbyists and educators due to its ease of use and wide range of available libraries and shields. |
| PIC | A family of microcontrollers produced by Microchip Technology. PIC microcontrollers are known for their low cost and wide range of available peripherals. |
| ARM | A family of microcontrollers based on the ARM architecture. ARM microcontrollers are known for their high performance and low power consumption. |
Designing a Microcontroller Circuit
Choosing a Microcontroller
The first step in designing a microcontroller circuit is to choose the right microcontroller for your application. When selecting a microcontroller, consider the following factors:
- Processing power
- Memory capacity
- Number and type of input/output peripherals
- Power consumption
- Cost
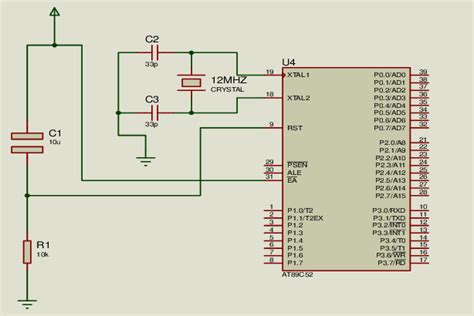
Schematic Design
Once you have selected a microcontroller, the next step is to create a schematic diagram of your circuit. A schematic diagram is a visual representation of the electronic components and their connections in your circuit. When designing your schematic, consider the following:
- Power supply requirements
- Input/output connections
- External components (e.g., sensors, displays, motors)
- Decoupling capacitors
- Crystal oscillator (if required)
PCB Layout
After creating your schematic, the next step is to design the printed circuit board (PCB) layout. The PCB layout is a physical representation of your schematic, showing the placement of components and the routing of traces. When designing your PCB layout, consider the following:
- Component placement for optimal signal integrity
- Trace width and spacing for impedance control
- Ground plane for noise reduction
- Mounting holes and connectors for mechanical stability

Building a Microcontroller Circuit
Component Selection
Once you have designed your schematic and PCB layout, the next step is to select the components for your circuit. When selecting components, consider the following:
- Voltage and current ratings
- Tolerance and accuracy
- Package type and size
- Cost and availability
PCB Fabrication
After selecting your components, the next step is to fabricate your PCB. There are several methods for fabricating PCBs, including:
- Etching: A chemical process that removes unwanted copper from the PCB surface.
- Milling: A mechanical process that uses a rotating bit to remove unwanted copper from the PCB surface.
- Printing: A process that uses conductive ink to print the PCB traces onto the board surface.
Soldering
Once your PCB is fabricated, the next step is to solder the components onto the board. When soldering, consider the following:
- Use the appropriate soldering iron and tip for your components.
- Use flux to improve solder flow and prevent oxidation.
- Inspect your solder joints for quality and consistency.

Programming a Microcontroller
Development Environment
To program a microcontroller, you will need a development environment that includes a compiler, debugger, and programming tools. Some popular development environments for microcontrollers include:
- Arduino IDE: An open-source development environment for Arduino microcontrollers.
- MPLAB X IDE: A development environment for PIC microcontrollers, produced by Microchip Technology.
- Keil MDK: A development environment for ARM microcontrollers, produced by ARM Ltd.
Programming Language
Microcontrollers are typically programmed using a high-level programming language, such as C or C++. Some microcontrollers also support assembly language programming for low-level control of the hardware.
Debugging
Debugging is an essential part of programming a microcontroller. Debugging tools allow you to step through your code, set breakpoints, and inspect variables to identify and fix errors in your program. Some popular debugging tools for microcontrollers include:
- Serial communication: Sending debug messages over a serial port to a computer for display and analysis.
- In-circuit debugging: Using a hardware debugger to control the microcontroller and inspect its internal state.
- Logic analyzer: Using a logic analyzer to capture and analyze digital signals in your circuit.

Testing and Verification
Functional Testing
Once your microcontroller circuit is built and programmed, the next step is to perform functional testing to verify that it works as intended. Functional testing involves applying inputs to your circuit and verifying that the outputs are correct. When performing functional testing, consider the following:
- Test all input/output combinations to ensure complete coverage.
- Use a variety of test cases, including edge cases and error conditions.
- Verify that the microcontroller responds correctly to interrupts and other events.
Performance Testing
In addition to functional testing, it is also important to perform performance testing to ensure that your microcontroller circuit meets its performance requirements. Performance testing involves measuring the speed, power consumption, and other characteristics of your circuit under various operating conditions. When performing performance testing, consider the following:
- Use a variety of performance metrics, such as response time, throughput, and power consumption.
- Test your circuit under different environmental conditions, such as temperature and humidity.
- Verify that your circuit meets its performance requirements over its entire operating range.
Conclusion
Creating a microcontroller circuit board is a complex process that requires knowledge of electronics, programming, and testing. By following the steps outlined in this article, you can design, build, and program a microcontroller circuit that meets your specific requirements. Whether you are a hobbyist or a professional engineer, understanding how to create a microcontroller circuit board is a valuable skill that can open up a wide range of possibilities in the world of embedded systems.
FAQs
What is the difference between a microcontroller and a microprocessor?
A microcontroller is a single-chip computer that contains a processor, memory, and input/output peripherals, while a microprocessor is a standalone processor that requires external memory and peripherals to function.
Can I use a breadboard to prototype my microcontroller circuit?
Yes, a breadboard is a useful tool for prototyping microcontroller circuits. However, keep in mind that breadboards are not suitable for high-frequency or high-current applications, and may introduce noise and other issues into your circuit.
How do I choose the right programming language for my microcontroller?
The choice of programming language depends on your specific requirements and the capabilities of your microcontroller. C and C++ are popular choices for microcontroller programming due to their efficiency and low-level control of the hardware. Some microcontrollers also support other languages, such as Python or BASIC.
How do I debug my microcontroller code?
There are several methods for debugging microcontroller code, including using serial communication to send debug messages to a computer, using an in-circuit debugger to control the microcontroller and inspect its internal state, and using a logic analyzer to capture and analyze digital signals in your circuit.
What is the difference between functional testing and performance testing?
Functional testing verifies that your microcontroller circuit works as intended by applying inputs and verifying outputs, while performance testing measures the speed, power consumption, and other characteristics of your circuit under various operating conditions. Both types of testing are important for ensuring the quality and reliability of your microcontroller circuit.


Leave a Reply