What is a Raspberry Pi Expansion Board?
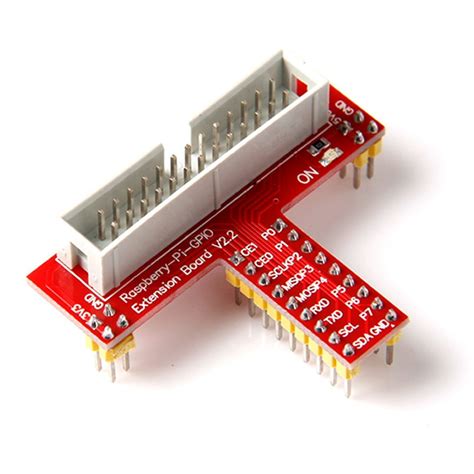
A Raspberry Pi expansion board, also known as a HAT (Hardware Attached on Top), is an add-on board that sits on top of the Raspberry Pi’s GPIO (General Purpose Input/Output) pins. It provides additional hardware features and interfaces that are not available on the Raspberry Pi itself. Expansion boards can offer a wide range of functionalities, such as:
- Additional GPIO pins
- Analog-to-digital converters (ADCs)
- Digital-to-analog converters (DACs)
- Motor controllers
- Display interfaces
- Wireless communication modules
- and much more…
By using an expansion board, you can customize your Raspberry Pi to suit your specific project requirements without the need for complex wiring or external modules.
Why DIY a Raspberry Pi Expansion Board?
While there are many commercially available Raspberry Pi expansion boards, there are several reasons why you might want to DIY your own:
-
Customization: By designing your own expansion board, you have complete control over the features and functionalities you include. You can tailor the board to your exact project needs.
-
Cost-effectiveness: Commercial expansion boards can be expensive, especially if you only need a specific set of features. DIYing your own board allows you to include only the components you require, potentially saving you money.
-
Learning experience: Building your own expansion board is an excellent way to learn about electronics, PCB design, and the Raspberry Pi’s hardware interface. It’s a hands-on educational experience that can enhance your skills.
-
Flexibility: With a custom expansion board, you have the flexibility to make modifications and improvements as your project evolves. You can easily add or remove components based on your changing requirements.

Planning Your Raspberry Pi Expansion Board
Before diving into the actual DIY process, it’s crucial to plan your expansion board. Here are the steps to follow:
Step 1: Define Your Requirements
Determine the specific features and functionalities you need for your project. Consider the following questions:
- What additional GPIO pins do you require?
- Do you need analog input or output capabilities?
- Are there any specific communication protocols you need to support (e.g., I2C, SPI, UART)?
- Do you need any special power requirements?
Make a list of all the components and interfaces you want to include on your expansion board.
Step 2: Research and Select Components
Based on your requirements list, research and select the appropriate components for your expansion board. Some common components include:
- GPIO expanders
- ADCs and DACs
- Motor drivers
- Display drivers
- Wireless modules (e.g., Bluetooth, Wi-Fi)
- Voltage regulators
- Connectors and headers
Ensure that the components you choose are compatible with the Raspberry Pi’s voltage levels and communication protocols.
Step 3: Design the Schematic
Create a schematic diagram of your expansion board using electronic design automation (EDA) software. The schematic should include all the components you’ve selected and show how they are interconnected. Pay attention to power supply requirements, signal routing, and proper connections to the Raspberry Pi’s GPIO pins.
Step 4: Design the PCB Layout
Once you have a complete schematic, you can proceed to design the PCB (Printed Circuit Board) layout. The PCB layout determines the physical placement of components and the routing of traces on the board. Consider factors such as component footprints, trace widths, spacing, and ground planes. Ensure that your PCB layout adheres to the Raspberry Pi HAT specifications for proper mechanical and electrical compatibility.

Building Your Raspberry Pi Expansion Board
With the planning and design phases complete, you’re ready to start building your Raspberry Pi expansion board. Follow these steps:
Step 1: Gather Required Tools and Materials
Before you begin, make sure you have the following tools and materials:
- Soldering iron and solder
- Flux and solder wick
- Tweezers and small pliers
- Multimeter
- PCB fabrication materials (copper-clad board, etching solution, etc.) or a PCB fabrication service
- Components specified in your design
Step 2: Fabricate the PCB
If you’re making the PCB yourself, follow these sub-steps:
- Print the PCB layout onto a transparency or use a laser printer to transfer the design onto the copper-clad board.
- Expose the board to UV light to harden the photoresist.
- Develop the board to remove the unexposed photoresist.
- Etch the board using an etching solution to remove the unwanted copper.
- Clean the board and drill any necessary holes.
Alternatively, you can use a PCB fabrication service to manufacture your PCB based on your design files.
Step 3: Assemble the Components
Once you have your PCB ready, it’s time to assemble the components:
- Start by soldering the smaller components first, such as resistors and capacitors.
- Progress to larger components like ICs, connectors, and headers.
- Pay attention to component orientation and ensure proper alignment.
- Use flux to improve soldering quality and solder wick to remove any excess solder.
Step 4: Test and Verify
After assembling the components, it’s crucial to test and verify the functionality of your expansion board:
- Visually inspect the board for any soldering defects or short circuits.
- Use a multimeter to check for continuity and proper connections.
- Power up the board and test each component and interface individually.
- Verify that the board communicates correctly with the Raspberry Pi.
Step 5: Install and Use Your Expansion Board
Once you’ve confirmed that your expansion board is functioning as expected, you can install it on your Raspberry Pi:
- Ensure that your Raspberry Pi is powered off.
- Carefully align the expansion board’s GPIO header with the Raspberry Pi’s GPIO pins.
- Gently press the board onto the Raspberry Pi, making sure it’s securely seated.
- Power on your Raspberry Pi and verify that the expansion board is recognized and working properly.
Congratulations! You’ve successfully DIYed your own Raspberry Pi expansion board.

Example: Building a Raspberry Pi Motor Controller Expansion Board
To illustrate the process of DIYing a Raspberry Pi expansion board, let’s walk through an example of building a motor controller board. This board will allow you to control two DC motors using the Raspberry Pi.
Components Required
| Component | Quantity |
|---|---|
| L293D Motor Driver IC | 1 |
| 16-pin DIP Socket | 1 |
| Screw Terminal Block | 2 |
| 100nF Ceramic Capacitor | 1 |
| 40-pin GPIO Header | 1 |
| PCB | 1 |
Schematic Design
Here’s a simplified schematic diagram for the motor controller expansion board:
     Raspberry Pi GPIO
+-----------------------+
|                       |
|    [40-pin Header]    |
|                       |
+-----------------------+
         |     |
         |     |
         |     |
         |     |
 +-------+     +-------+
 |                     |
 |    L293D Motor      |
 |    Driver IC        |
 |                     |
 +-------+     +-------+
     |     |     |     |
     |     |     |     |
+----+     +-----+     +----+
|                           |
|    Screw Terminal         |
|    Blocks                 |
|                           |
+---------------------------+
         |     |
         |     |
      Motor1  Motor2
PCB Layout
Design the PCB layout based on the schematic, ensuring proper component placement and routing. Consider factors such as trace width, spacing, and ground planes.
Assembly Instructions
- Solder the 16-pin DIP socket onto the PCB.
- Insert the L293D motor driver IC into the DIP socket, ensuring correct orientation.
- Solder the 40-pin GPIO header onto the PCB, aligning it with the Raspberry Pi’s GPIO pins.
- Solder the screw terminal blocks onto the PCB for connecting the motors.
- Solder the 100nF ceramic capacitor close to the L293D IC for decoupling.
- Visually inspect the board for any soldering defects or short circuits.
Usage
- Install the motor controller expansion board onto your Raspberry Pi’s GPIO pins.
- Connect the motors to the screw terminal blocks, paying attention to the polarity.
- Power on your Raspberry Pi.
- Use appropriate software libraries or GPIO commands to control the motors through the L293D motor driver IC.
Frequently Asked Questions (FAQ)
-
What skills do I need to DIY a Raspberry Pi expansion board?
To successfully DIY a Raspberry Pi expansion board, you should have a basic understanding of electronics, soldering skills, and familiarity with PCB design software. Knowledge of the Raspberry Pi’s GPIO interface and programming skills in languages like Python or C++ are also beneficial. -
Can I use any components for my expansion board?
It’s important to choose components that are compatible with the Raspberry Pi’s voltage levels (3.3V) and communication protocols. Make sure to refer to the component datasheets and select components that can interface with the Raspberry Pi’s GPIO pins correctly. -
How do I ensure my expansion board is compatible with the Raspberry Pi?
To ensure compatibility, follow the Raspberry Pi HAT (Hardware Attached on Top) specifications. These specifications provide guidelines for mechanical dimensions, electrical characteristics, and GPIO usage. Adhering to these specifications will ensure proper fit and functionality with the Raspberry Pi. -
What software do I need to design my expansion board?
There are various electronic design automation (EDA) software options available for designing PCBs. Some popular choices include KiCad, Eagle, and Altium Designer. These software tools allow you to create schematic diagrams and design PCB layouts. -
Can I sell my custom Raspberry Pi expansion board?
Yes, you can sell your custom Raspberry Pi expansion board. However, ensure that you comply with any relevant regulations, such as electrical safety standards and certifications. Additionally, consider open-sourcing your design files and providing documentation to enable others to build and modify your expansion board.
Conclusion
DIYing a Raspberry Pi expansion board is an exciting and rewarding project that allows you to extend the capabilities of your Raspberry Pi. By following the steps outlined in this article, you can plan, design, and build your own custom expansion board tailored to your specific project requirements.
Remember to carefully plan your design, select compatible components, and pay attention to PCB layout and assembly best practices. Testing and verification are crucial steps to ensure your expansion board functions as intended.
Building your own Raspberry Pi expansion board not only provides you with the flexibility and customization options you need but also serves as an excellent learning experience in electronics and PCB design.
So, grab your tools, gather your components, and embark on the exciting journey of DIYing your own Raspberry Pi expansion board. With creativity and perseverance, you’ll be able to create a unique and powerful addition to your Raspberry Pi projects.
Happy building!


Leave a Reply