What is ExpressPCB?
ExpressPCB is a powerful yet user-friendly software tool for designing printed circuit boards (PCBs). It allows you to quickly and easily create PCB layouts, schematics, and manufacturing files, making it an ideal choice for hobbyists, students, and professionals alike. In this comprehensive ExpressPCB Tutorial, we’ll walk you through the process of designing a PCB from start to finish.
Getting Started with ExpressPCB
System Requirements
Before we dive into the tutorial, let’s make sure your system meets the minimum requirements to run ExpressPCB:
| Operating System | Minimum Requirements |
|---|---|
| Windows | Windows XP or later |
| Mac OS | Not supported |
| Linux | Not supported |
Downloading and Installing ExpressPCB
To get started, visit the official ExpressPCB website (www.expresspcb.com) and download the latest version of the software. The installation process is straightforward:
- Double-click the downloaded file to start the installation wizard.
- Follow the on-screen instructions to complete the installation.
- Once the installation is complete, launch ExpressPCB from your desktop or start menu.

Creating a New Project
Step 1: Launch ExpressPCB
When you first launch ExpressPCB, you’ll be greeted with the main window. From here, you can create a new project or open an existing one.
Step 2: Create a New Project
To create a new project, click on the “New” button in the toolbar or select “File” > “New” from the menu.
Step 3: Choose Your Project Type
ExpressPCB offers two project types:
- PCB Design – for creating PCB layouts and manufacturing files
- Schematic – for creating circuit schematics
For this tutorial, we’ll focus on creating a PCB layout, so select “PCB Design” and click “OK”.

Designing Your PCB Layout
Step 1: Set Your Board Dimensions
The first step in designing your PCB layout is to set the dimensions of your board. To do this:
- Click on the “Board Outline” button in the toolbar.
- Click and drag on the grid to draw your board outline.
- Use the properties panel on the right to fine-tune your board dimensions.
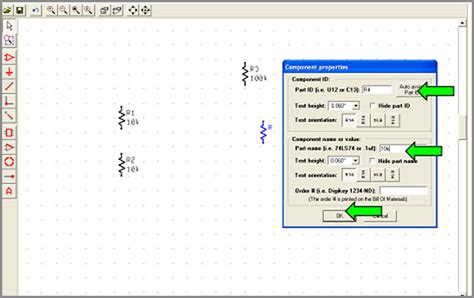
Step 2: Place Your Components
Next, you’ll need to place your components on the board. ExpressPCB provides a extensive library of common components, or you can create your own custom parts.
To place a component:
- Click on the “Component” button in the toolbar.
- Select the desired component from the library or create a new one.
- Click on the board to place the component.
- Use the properties panel to adjust the component’s position and orientation.
Step 3: Route Your Traces
Once your components are placed, you’ll need to route the traces that connect them. ExpressPCB provides powerful auto-routing tools to make this process quick and easy.
To route your traces:
- Click on the “Auto-Route” button in the toolbar.
- Select your desired routing settings in the properties panel.
- Click “OK” to start the auto-routing process.
- Review the generated traces and make any necessary manual adjustments.
Step 4: Add Text and Graphics
To add text and graphics to your PCB layout:
- Click on the “Text” or “Graphics” button in the toolbar.
- Select your desired text or graphic settings in the properties panel.
- Click on the board to place the text or graphic.
- Use the properties panel to adjust the position and appearance of your text or graphics.

Generating Manufacturing Files
Once your PCB layout is complete, you’ll need to generate manufacturing files to send to your PCB fabricator.
To generate manufacturing files:
- Click on the “Manufacturing Output” button in the toolbar.
- Select your desired output settings in the properties panel.
- Click “OK” to generate the files.
- Save the generated files to your desired location.
Frequently Asked Questions (FAQ)
1. Is ExpressPCB free to use?
ExpressPCB offers a free version with limited features and a paid version with full functionality. The free version is suitable for small, simple projects, while the paid version is recommended for more complex designs.
2. Can I import designs from other PCB software?
Yes, ExpressPCB supports importing designs from a variety of popular PCB design formats, including Eagle, Altium, and KiCad.
3. Does ExpressPCB offer simulation tools?
No, ExpressPCB does not include built-in simulation tools. However, you can export your designs to third-party simulation software for analysis.
4. Can I create multi-layer PCBs with ExpressPCB?
Yes, ExpressPCB supports the design of multi-layer PCBs, allowing you to create complex, high-density designs.
5. Does ExpressPCB offer a library of pre-made components?
Yes, ExpressPCB includes an extensive library of common components, including resistors, capacitors, ICs, and connectors. You can also create your own custom components as needed.
Conclusion
ExpressPCB is a powerful yet easy-to-use software tool for designing PCBs. By following this step-by-step tutorial, you should now have a solid understanding of how to create a PCB layout, place components, route traces, and generate manufacturing files. With practice and experimentation, you’ll be designing complex, professional-quality PCBs in no time. Happy designing!


Leave a Reply