Introduction to PCB Post-Cleaning
Printed Circuit Boards (PCBs) are essential components in modern electronic devices, from smartphones and laptops to industrial equipment and medical devices. The manufacturing process of PCBs involves several stages, including design, fabrication, assembly, and testing. However, even after the initial manufacturing process, PCBs may require rework due to various reasons, such as component failure, design changes, or quality issues.
The rework process involves removing and replacing components, as well as resoldering and repairing damaged traces or pads. While rework is necessary to ensure the functionality and reliability of the PCB, it can also introduce contaminants and residues that can adversely affect the performance and longevity of the board. This is where PCB post-cleaning comes into play.
What is PCB Post-Cleaning?
PCB post-cleaning refers to the process of removing contaminants, flux residues, and other unwanted materials from the surface of a PCB after the rework process. This cleaning process is crucial to ensure the reliability, functionality, and longevity of the PCB.
The post-cleaning process typically involves the use of specialized cleaning agents and equipment to remove various types of contaminants, such as:
- Flux residues
- Solder paste residues
- Fingerprints and oils
- Dust and debris
- Ionic contamination
Why is PCB Post-Cleaning Important?
PCB post-cleaning is essential for several reasons:
-
Reliability: Contaminants and residues left on the PCB surface can lead to corrosion, dendrite growth, and other issues that can compromise the reliability of the board over time. Post-cleaning ensures that these contaminants are removed, thereby improving the overall reliability of the PCB.
-
Functionality: Residues and contaminants can also interfere with the electrical properties of the PCB, leading to signal integrity issues, short circuits, or open circuits. By removing these unwanted materials, post-cleaning helps maintain the proper functionality of the PCB.
-
Longevity: A clean PCB is less susceptible to environmental factors such as humidity, temperature fluctuations, and chemical exposure. By removing contaminants that can accelerate the degradation process, post-cleaning can extend the lifespan of the PCB.
-
Regulatory compliance: Depending on the industry and application, PCBs may need to comply with various cleanliness standards, such as IPC-A-610, IPC-J-STD-001, or MIL-STD-2000. Post-cleaning helps ensure that the PCB meets these requirements.
The Rework Process and Its Impact on PCB Cleanliness
Common Reasons for PCB Rework
PCBs may require rework for various reasons, including:
- Component failure or malfunction
- Design changes or upgrades
- Manufacturing defects or quality issues
- Damage during handling or assembly
Rework Techniques and Their Potential Contaminants
The rework process involves several techniques, each of which can introduce different types of contaminants:
-
Desoldering: Removing components from the PCB using heat and suction can leave behind flux residues, solder particles, and burnt or charred materials.
-
Soldering: Replacing components or repairing traces involves the use of solder and flux, which can introduce new residues and contaminants onto the PCB surface.
-
Cleaning: During the rework process, technicians may use various cleaning agents, such as isopropyl alcohol or other solvents, to remove old residues. However, improper use of these agents can lead to additional contamination or damage to the PCB.
-
Handling: Human intervention during the rework process can introduce contaminants such as fingerprints, oils, and debris from tools or the work environment.
The Importance of Proper Rework Procedures
To minimize the introduction of contaminants during the rework process, it is essential to follow proper procedures and guidelines, such as:
- Using the appropriate tools and equipment for each rework task
- Ensuring proper ventilation and temperature control in the work environment
- Wearing gloves and other protective gear to prevent contamination from human contact
- Following the manufacturer’s recommendations for cleaning agents and methods
- Inspecting the PCB before and after the rework process to identify and address any issues

PCB Post-Cleaning Methods and Best Practices
Cleaning Agents and Solvents
There are various cleaning agents and solvents available for PCB post-cleaning, each with its own advantages and limitations. Some common cleaning agents include:
- Isopropyl alcohol (IPA)
- Deionized water (DI water)
- Saponifiers
- Terpenes
- Aqueous cleaners
The choice of cleaning agent depends on the type of contaminants present, the materials used in the PCB, and the specific requirements of the application.
Cleaning Equipment and Techniques
PCB post-cleaning can be performed using various equipment and techniques, such as:
-
Manual cleaning: This involves using brushes, swabs, or wipes to manually apply the cleaning agent and remove contaminants. Manual cleaning is suitable for small-scale rework or hard-to-reach areas but may be time-consuming and less consistent than automated methods.
-
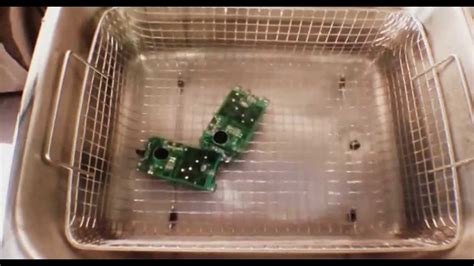
Ultrasonic cleaning: This technique uses high-frequency sound waves to agitate the cleaning solution and dislodge contaminants from the PCB surface. Ultrasonic cleaning is effective for removing stubborn residues and can be automated for large-scale production.
-
Spray cleaning: This method involves spraying the cleaning agent onto the PCB surface using a pressurized nozzle. Spray cleaning is fast and efficient but may require additional rinsing and drying steps.
-
Vapor degreasing: This technique uses heated solvents in a closed chamber to create a vapor that condenses on the PCB surface, dissolving contaminants. Vapor degreasing is highly effective but requires specialized equipment and may not be suitable for all PCB materials.
Best Practices for PCB Post-Cleaning
To ensure optimal results and minimize the risk of damage during PCB post-cleaning, follow these best practices:
-
Select the appropriate cleaning agent and equipment based on the type of contaminants, PCB materials, and application requirements.
-
Follow the manufacturer’s recommendations for the concentration, temperature, and exposure time of the cleaning agent.
-
Use filtered, high-purity solvents and deionized water to prevent introducing new contaminants during the cleaning process.
-
Ensure proper ventilation and temperature control in the cleaning area to prevent the buildup of fumes or moisture.
-
After cleaning, thoroughly rinse the PCB with deionized water to remove any residual cleaning agents.
-
Dry the PCB using filtered compressed air, a clean oven, or a specialized drying cabinet to prevent moisture-related issues.
-
Inspect the PCB after cleaning to verify that all contaminants have been removed and that no damage has occurred during the process.

Cleanliness Testing and Inspection
Visual Inspection
Visual inspection is the first step in assessing the cleanliness of a PCB after the post-cleaning process. This involves using a magnifying glass, microscope, or other visual aid to examine the PCB surface for any visible contaminants, residues, or damage.
Visual inspection can help identify issues such as:
- Flux residues
- Solder balls or splashes
- Discoloration or corrosion
- Physical damage to components or traces
However, visual inspection has limitations, as it cannot detect microscopic or chemical contaminants that may be present on the PCB surface.
Ionic Contamination Testing
Ionic contamination testing is a quantitative method for measuring the level of ionic residues on a PCB surface. This is important because ionic contaminants, such as salts or acids, can lead to corrosion, dendrite growth, and other reliability issues over time.
Ionic contamination testing typically involves the following steps:
-
Extracting a sample of the contaminants from the PCB surface using a specialized solution.
-
Measuring the conductivity of the extracted solution using a resistivity meter or ion chromatography system.
-
Comparing the measured conductivity to a predetermined threshold or standard, such as IPC-TM-650 or MIL-STD-2000.
The results of ionic contamination testing can help determine whether the PCB meets the required cleanliness level for its intended application.
Other Cleanliness Testing Methods
In addition to visual inspection and ionic contamination testing, there are other methods for assessing PCB cleanliness, such as:
- Surface insulation resistance (SIR) testing
- Fourier-transform infrared spectroscopy (FTIR)
- Ion chromatography
- Gas chromatography-mass spectrometry (GC-MS)
These advanced techniques can provide more detailed information about the chemical composition and concentration of contaminants on the PCB surface.

Frequently Asked Questions (FAQ)
-
Q: What is the difference between no-clean and water-soluble flux?
A: No-clean flux is designed to leave minimal residue after soldering and does not require post-cleaning in most cases. Water-soluble flux, on the other hand, leaves a residue that must be cleaned using water or other cleaning agents to prevent corrosion and other issues. -
Q: Can I use isopropyl alcohol for PCB post-cleaning?
A: Isopropyl alcohol (IPA) is a common cleaning agent for PCBs, but its effectiveness may vary depending on the type of contaminants present. IPA is generally suitable for removing light oils and fingerprints but may not be strong enough for heavy flux residues or other stubborn contaminants. -
Q: What is the recommended cleanliness level for PCBs?
A: The recommended cleanliness level for PCBs depends on the specific application and industry standards. For example, IPC-A-610 specifies a maximum ionic contamination level of 1.56 µg/cm² for general electronics, while MIL-STD-2000 requires a more stringent level of 0.4 µg/cm² for military and aerospace applications. -
Q: How often should I perform PCB post-cleaning?
A: PCB post-cleaning should be performed whenever a board undergoes rework or repair that involves soldering or desoldering components. Additionally, boards may require periodic cleaning to remove accumulated contaminants from the operating environment, such as dust or moisture. -
Q: Can PCB post-cleaning damage components or traces?
A: Improper PCB post-cleaning can potentially damage components or traces if the wrong cleaning agents or techniques are used. For example, using highly alkaline or acidic cleaners can corrode certain metals, while excessive scrubbing or pressure can dislodge components or break traces. To prevent damage, always follow the manufacturer’s recommendations and best practices for PCB cleaning.
Conclusion
PCB post-cleaning is a critical step in ensuring the reliability, functionality, and longevity of printed circuit boards after the rework process. By removing contaminants, flux residues, and other unwanted materials from the PCB surface, post-cleaning helps prevent issues such as corrosion, dendrite growth, and signal integrity problems.
To achieve optimal results, it is essential to select the appropriate cleaning agents, equipment, and techniques based on the type of contaminants present, the materials used in the PCB, and the specific requirements of the application. Additionally, following best practices for handling, cleaning, and inspection can help minimize the risk of damage and ensure that the PCB meets the required cleanliness standards.
As electronic devices continue to become more complex and mission-critical, the importance of PCB post-cleaning will only continue to grow. By investing in proper cleaning processes and technologies, manufacturers can improve the quality, reliability, and performance of their products while reducing the risk of field failures and warranty claims.


Leave a Reply