Introduction to PCB Assembly Optimization
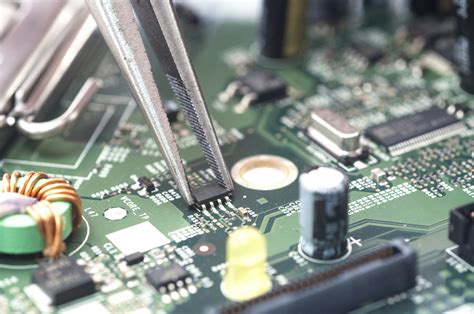
Printed circuit board (PCB) assembly is a complex process that involves placing and soldering electronic components onto a PCB substrate. Optimizing the PCB assembly process is critical for ensuring high quality, reliability, and efficiency in electronic devices. One key aspect of PCB assembly optimization is ensuring the correct orientation of components on the board.
Incorrect component orientation can lead to a variety of problems, such as short circuits, open circuits, and degraded performance. It can also increase the risk of component damage during the assembly process, leading to higher manufacturing costs and lower yields. Therefore, it is essential to follow best practices for ensuring correct component orientation during PCB assembly.
In this article, we will discuss some of the best practices for optimizing PCB assembly and ensuring correct component orientation. We will cover topics such as component placement, soldering techniques, inspection methods, and more. By following these best practices, you can improve the quality and reliability of your PCB assemblies while reducing costs and increasing efficiency.
The Importance of Correct Component Orientation in PCB Assembly
Correct component orientation is critical for the proper functioning and reliability of electronic devices. When components are placed incorrectly on a PCB, it can lead to a variety of problems that can affect the performance and longevity of the device.
One common issue caused by incorrect component orientation is short circuits. If a component is placed in the wrong orientation, it may cause unintended connections between different parts of the circuit, leading to short circuits that can damage the device or cause it to malfunction.
Another problem that can arise from incorrect component orientation is open circuits. If a component is not properly connected to the PCB due to incorrect orientation, it may cause an open circuit that prevents the device from functioning as intended.
Incorrect component orientation can also lead to degraded performance of the device. For example, if a capacitor or inductor is placed in the wrong orientation, it may not function properly and can cause issues such as signal distortion or power supply instability.
In addition to these functional problems, incorrect component orientation can also increase the risk of component damage during the assembly process. If a component is placed in the wrong orientation, it may be subjected to excessive stress or heat during soldering, which can cause it to fail prematurely.
To avoid these issues and ensure the proper functioning and reliability of electronic devices, it is essential to follow best practices for ensuring correct component orientation during PCB assembly. In the following sections, we will discuss some of these best practices in detail.

Best Practices for Ensuring Correct Component Orientation
1. Use clear and consistent labeling
One of the most important best practices for ensuring correct component orientation is to use clear and consistent labeling on both the PCB and the components themselves. This includes using standardized symbols and text to indicate the orientation of components, such as polarity markings for capacitors and diodes.
It is also important to ensure that the labeling on the PCB matches the labeling on the components. This can be achieved through careful design and review of the PCB layout and bill of materials (BOM).
2. Use automated assembly equipment
Another best practice for ensuring correct component orientation is to use automated assembly equipment whenever possible. Automated pick-and-place machines and vision systems can help to ensure that components are placed in the correct orientation with a high degree of accuracy and consistency.
Automated equipment can also help to reduce the risk of human error during the assembly process. However, it is important to ensure that the equipment is properly calibrated and maintained to ensure optimal performance.
3. Implement robust quality control processes
Implementing robust quality control processes is another key best practice for ensuring correct component orientation. This includes conducting regular inspections and tests throughout the assembly process to identify and correct any issues with component orientation.
Some common quality control methods for ensuring correct component orientation include:
- Visual inspection: Visually inspecting PCBs and components for correct orientation using magnification or automated vision systems.
- Electrical testing: Conducting electrical tests to verify that components are properly connected and functioning as intended.
- X-ray inspection: Using X-ray imaging to inspect the internal structure of the PCB and components for correct orientation and alignment.
4. Use standardized component packaging
Using standardized component packaging is another best practice for ensuring correct component orientation. Standardized packaging, such as tape and reel or tray packaging, helps to ensure that components are presented to the assembly equipment in a consistent and predictable manner.
This can help to reduce the risk of component misalignment or incorrect orientation during the assembly process. It can also help to streamline the assembly process and reduce the need for manual intervention.
5. Provide clear work instructions and training
Providing clear work instructions and training to assembly operators is another important best practice for ensuring correct component orientation. This includes providing detailed instructions on how to handle and place components correctly, as well as training on the use of assembly equipment and quality control processes.
Clear work instructions and training can help to reduce the risk of human error during the assembly process and ensure that all operators are following the same best practices for component orientation.

Common Issues with Component Orientation and How to Avoid Them
Despite following best practices for ensuring correct component orientation, issues can still arise during the PCB assembly process. Here are some common issues with component orientation and how to avoid them:
1. Polarity reversal
Polarity reversal occurs when a component is placed in the opposite orientation than intended, such as a capacitor or diode being placed backwards. This can cause short circuits or other issues that can damage the device or cause it to malfunction.
To avoid polarity reversal, it is important to use clear labeling and markings to indicate the correct orientation of components. It is also important to use automated assembly equipment and vision systems to verify that components are placed correctly.
2. Misalignment
Misalignment occurs when a component is placed in the correct orientation but is not properly aligned with the pads or holes on the PCB. This can cause poor soldering or open circuits that can affect the performance of the device.
To avoid misalignment, it is important to use automated assembly equipment with high-precision placement capabilities. It is also important to use standardized component packaging and to ensure that the PCB design allows for sufficient clearance and spacing between components.
3. Tombstoning
Tombstoning occurs when a small two-terminal component, such as a resistor or capacitor, stands up on one end during the soldering process. This can cause open circuits or poor connections that can affect the performance of the device.
To avoid tombstoning, it is important to use a well-controlled soldering process with appropriate temperature and time settings. It is also important to use components with balanced terminations and to ensure that the PCB design allows for sufficient pad size and spacing.
4. Bill of Materials (BOM) errors
BOM errors occur when the wrong component is used or when a component is omitted from the assembly process altogether. This can cause functional issues or even damage to the device.
To avoid BOM errors, it is important to carefully review and verify the BOM before beginning the assembly process. It is also important to use automated systems for material management and to implement robust quality control processes to catch any errors early in the process.
By being aware of these common issues and taking steps to avoid them, you can help to ensure that your PCB assemblies are of high quality and reliability.

Inspection Methods for Verifying Component Orientation
Inspection is a critical step in the PCB assembly process for verifying that components are placed in the correct orientation. Here are some common inspection methods used for verifying component orientation:
1. Visual inspection
Visual inspection involves visually examining the PCB and components for correct orientation using magnification or automated vision systems. This method is often used for larger components or those with clear orientation markings.
Visual inspection can be done manually by trained operators or using automated vision systems that can quickly scan the PCB for any orientation issues. Automated vision systems can also be programmed to detect specific types of orientation errors, such as polarity reversal or misalignment.
2. Automated optical inspection (AOI)
AOI is an automated inspection method that uses cameras and image processing software to inspect the PCB for a variety of defects, including component orientation errors. AOI systems can quickly scan the entire PCB and identify any components that are placed incorrectly or misaligned.
AOI systems can be programmed with specific parameters for each component, such as polarity markings or pin configurations, to ensure that they are placed correctly. They can also be integrated with other automated assembly equipment, such as pick-and-place machines, to provide real-time feedback and correction of orientation errors.
3. X-ray inspection
X-ray inspection is a non-destructive testing method that uses X-ray imaging to inspect the internal structure of the PCB and components for correct orientation and alignment. This method is particularly useful for inspecting components that are hidden from view, such as ball grid array (BGA) packages or those with internal leads.
X-ray inspection can detect a variety of orientation errors, such as misaligned or missing solder balls, incorrect pin configurations, or voids in the solder joints. It can also help to identify any internal damage or defects that may not be visible from the surface of the PCB.
4. Electrical testing
Electrical testing involves applying electrical signals to the PCB and measuring the response to verify that components are properly connected and functioning as intended. This method can help to identify any open circuits or short circuits caused by incorrect component orientation.
Electrical testing can be done using a variety of methods, such as in-circuit testing (ICT), flying probe testing, or functional testing. These methods can be automated or performed manually by trained operators.
By using a combination of these inspection methods, you can help to ensure that your PCB assemblies are free from component orientation errors and are functioning as intended. It is important to choose the appropriate inspection methods based on the specific requirements of your PCB design and assembly process.
Table: Summary of Best Practices for Ensuring Correct Component Orientation
| Best Practice | Description |
|---|---|
| Use clear and consistent labeling | Use standardized symbols and text to indicate the orientation of components on both the PCB and components themselves. |
| Use automated assembly equipment | Use automated pick-and-place machines and vision systems to ensure that components are placed in the correct orientation with high accuracy and consistency. |
| Implement robust quality control processes | Conduct regular inspections and tests throughout the assembly process to identify and correct any issues with component orientation, such as visual inspection, electrical testing, and X-ray inspection. |
| Use standardized component packaging | Use standardized packaging, such as tape and reel or tray packaging, to ensure that components are presented to the assembly equipment in a consistent and predictable manner. |
| Provide clear work instructions and training | Provide detailed instructions and training to assembly operators on how to handle and place components correctly and use assembly equipment and quality control processes. |
FAQ
Q1: Why is correct component orientation important in PCB assembly?
A1: Correct component orientation is critical for the proper functioning and reliability of electronic devices. Incorrect orientation can lead to short circuits, open circuits, degraded performance, and increased risk of component damage during the assembly process.
Q2: What are some common issues caused by incorrect component orientation?
A2: Some common issues caused by incorrect component orientation include polarity reversal, misalignment, tombstoning, and BOM errors. These issues can cause functional problems, damage to the device, or even complete failure.
Q3: What are some best practices for ensuring correct component orientation?
A3: Some best practices for ensuring correct component orientation include using clear and consistent labeling, using automated assembly equipment, implementing robust quality control processes, using standardized component packaging, and providing clear work instructions and training to assembly operators.
Q4: What are some inspection methods used for verifying component orientation?
A4: Some common inspection methods used for verifying component orientation include visual inspection, automated optical inspection (AOI), X-ray inspection, and electrical testing. These methods can help to identify any orientation errors or defects early in the assembly process.
Q5: How can automated assembly equipment help to ensure correct component orientation?
A5: Automated assembly equipment, such as pick-and-place machines and vision systems, can help to ensure that components are placed in the correct orientation with high accuracy and consistency. They can also help to reduce the risk of human error during the assembly process and provide real-time feedback and correction of orientation errors.
Conclusion
Ensuring correct component orientation is a critical aspect of PCB assembly optimization. Incorrect orientation can lead to a variety of problems that can affect the performance, reliability, and longevity of electronic devices. By following best practices such as using clear labeling, automated assembly equipment, robust quality control processes, standardized component packaging, and providing clear work instructions and training, you can help to minimize the risk of orientation errors and ensure high-quality PCB assemblies.
It is also important to be aware of common issues with component orientation, such as polarity reversal, misalignment, tombstoning, and BOM errors, and take steps to avoid them. By using appropriate inspection methods, such as visual inspection, AOI, X-ray inspection, and electrical testing, you can verify that components are placed correctly and catch any errors early in the assembly process.
Ultimately, optimizing PCB assembly requires a holistic approach that considers all aspects of the process, from design and component selection to assembly and inspection. By following best practices and continuously improving your processes, you can achieve high-quality, reliable, and cost-effective PCB assemblies that meet the needs of your customers and end-users.


Leave a Reply