Understanding UV Soldermask
Before diving into the application process, let’s first understand what UV soldermask is and why it is important. UV soldermask is a photosensitive polymer coating that is applied to the surface of a PCB. When exposed to ultraviolet (UV) light, the soldermask hardens, forming a protective layer that insulates the copper traces and prevents short circuits. Additionally, soldermask provides a visual contrast, making it easier to identify the various components and connections on the board.
Advantages of UV Soldermask
UV soldermask offers several advantages over traditional soldermask application methods:
- Ease of Application: UV soldermask can be applied using readily available materials and equipment, making it accessible for hobbyists and small-scale PCB manufacturers.
- Quick Curing: Unlike other soldermask types that require lengthy curing processes, UV soldermask can be cured rapidly by exposing it to UV light, significantly reducing the overall manufacturing time.
- Excellent Protection: UV soldermask provides excellent insulation and protection against moisture, dust, and other environmental factors, ensuring the long-term reliability of the PCB.
- Customizable: With UV soldermask, you have the flexibility to choose different colors and even create custom designs, allowing for unique and visually appealing PCBs.
Materials and Equipment
To apply UV soldermask to your PCB board at home, you will need the following materials and equipment:
- UV soldermask (available in various colors)
- UV exposure unit or a UV LED light source
- Transparency film or photomask
- Squeegee or foam brush
- Developing solution (sodium carbonate or potassium carbonate)
- Protective gloves and eyewear
- Cleaning supplies (isopropyl alcohol, lint-free wipes)

Step-by-Step Guide
Step 1: PCB Preparation
Before applying the UV soldermask, ensure that your PCB is clean and free from any contaminants. Follow these steps to prepare your PCB:
- Clean the PCB using isopropyl alcohol and lint-free wipes to remove any dust, grease, or fingerprints.
- Inspect the PCB for any defects or scratches on the copper traces. If necessary, repair any issues before proceeding.
Step 2: Applying UV Soldermask
Now that your PCB is clean and ready, it’s time to apply the UV soldermask. Follow these steps:
- Wear protective gloves and eyewear to avoid direct contact with the soldermask and UV light.
- Place the PCB on a flat surface and secure it to prevent movement during the application process.
- Using a squeegee or foam brush, apply a thin and even layer of UV soldermask over the entire surface of the PCB. Ensure that all copper traces are covered, leaving only the desired areas (such as pads and vias) exposed.
- Allow the soldermask to settle and level out for a few minutes to eliminate any air bubbles or uneven sections.
Step 3: UV Exposure
Once the UV soldermask is applied, it’s time to expose it to UV light to cure and harden the coating. Follow these steps:
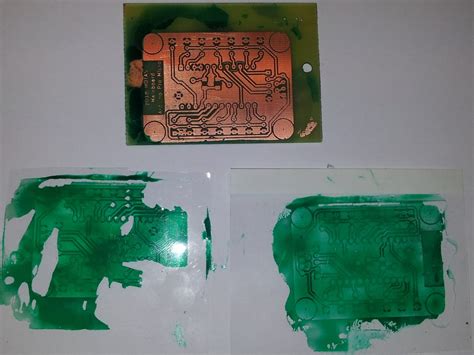
- Create a photomask or transparency film with the desired soldermask pattern. The photomask should be printed on a transparent sheet using a laser printer or photoplotter.
- Place the photomask on top of the PCB, ensuring that it is aligned correctly with the copper traces and pads.
- Position the PCB with the photomask in a UV exposure unit or under a UV LED light source.
- Expose the PCB to UV light for the recommended duration specified by the soldermask manufacturer. The exposure time may vary depending on the type of soldermask and the intensity of the UV light source.
Step 4: Developing
After the UV exposure, the soldermask needs to be developed to remove the uncured areas. Follow these steps:
- Prepare the developing solution by mixing sodium carbonate or potassium carbonate with water according to the manufacturer’s instructions.
- Immerse the PCB in the developing solution and gently agitate it for the recommended duration.
- Remove the PCB from the solution and rinse it thoroughly with water to remove any remaining developer.
- Inspect the PCB to ensure that the soldermask has been properly developed and that all desired areas are exposed. If necessary, repeat the developing process until satisfactory results are achieved.
Step 5: Final Curing
To ensure the long-term durability and protection of the UV soldermask, a final curing step is required. Follow these steps:
- Place the developed PCB in the UV exposure unit or under the UV LED light source for an additional period, as specified by the soldermask manufacturer. This final curing step helps to fully polymerize the soldermask and improves its adhesion to the PCB.
- After the final curing, allow the PCB to cool down to room temperature.
Step 6: Inspection and Cleaning
Before using the PCB, perform a final inspection and cleaning. Follow these steps:
- Visually inspect the PCB for any defects, such as incomplete coverage, bubbles, or cracks in the soldermask. If any issues are found, the soldermask application process may need to be repeated.
- Clean the PCB using isopropyl alcohol and lint-free wipes to remove any residue or contaminants that may have accumulated during the application process.

Tips and Tricks
To ensure the best results when applying UV soldermask to your PCB board at home, consider the following tips and tricks:
- Ensure Proper Ventilation: UV soldermask may emit fumes during the application and curing process. Work in a well-ventilated area or use a fume extractor to minimize exposure to harmful vapors.
- Control the Thickness: Applying the soldermask in a thin and even layer is crucial for optimal protection and curing. Avoid applying too much soldermask, as it may lead to incomplete curing or a non-uniform surface.
- Experiment with Different Colors: UV soldermask is available in various colors, allowing you to customize the appearance of your PCB. Experiment with different colors to create visually appealing designs or to color-code specific sections of the board.
- Practice on Scrap Boards: Before applying UV soldermask to your final PCB, practice the application process on scrap boards or test pieces. This will help you familiarize yourself with the techniques and identify any potential issues before working on your actual project.

Troubleshooting
If you encounter any problems during the UV soldermask application process, consider the following troubleshooting tips:
- Incomplete Curing: If the soldermask remains tacky or fails to harden after UV exposure, it may indicate insufficient exposure time or a weak UV light source. Increase the exposure time or use a more powerful UV light source to ensure complete curing.
- Bubbles or Uneven Coverage: If you notice bubbles or uneven coverage in the soldermask, it may be due to improper application technique or contamination on the PCB surface. Ensure that the PCB is clean and apply the soldermask in a slow and controlled manner to minimize air entrapment.
- Poor Adhesion: If the soldermask peels off or doesn’t adhere well to the PCB, it may indicate improper surface preparation or incompatibility between the soldermask and the PCB material. Ensure that the PCB is clean and roughen the surface slightly with fine-grit sandpaper to improve adhesion.
Frequently Asked Questions (FAQ)
-
Can I apply UV soldermask to a double-sided PCB?
Yes, UV soldermask can be applied to both sides of a double-sided PCB. However, you will need to apply and cure each side separately, ensuring proper alignment of the photomask on both sides. -
How long does UV soldermask take to cure?
The curing time for UV soldermask varies depending on the specific product and the intensity of the UV light source. Typically, curing takes anywhere from a few minutes to several hours. Refer to the manufacturer’s instructions for the recommended curing time. -
Can I reapply UV soldermask if I make a mistake during the application process?
Yes, if you make a mistake during the application process, you can remove the uncured soldermask using isopropyl alcohol and start over. However, be cautious not to damage the underlying copper traces while removing the soldermask. -
Is UV soldermask suitable for high-temperature applications?
UV soldermask is generally suitable for most standard operating temperatures. However, for high-temperature applications, it’s recommended to use specialized high-temperature soldermasks that can withstand elevated temperatures without degradation. -
Can I mix different colors of UV soldermask to create custom shades?
Mixing different colors of UV soldermask is not recommended, as it may affect the curing properties and the final appearance of the soldermask. If you require a specific color that is not readily available, it’s best to contact the soldermask manufacturer for custom color options.
Conclusion
Applying UV soldermask to your PCB board at home is a cost-effective and efficient way to protect and enhance the functionality of your electronic projects. By following the step-by-step guide outlined in this article and considering the tips and troubleshooting advice, you can achieve professional-quality results without the need for expensive equipment or outsourcing.
Remember to prioritize safety by wearing protective gear and working in a well-ventilated area. With practice and patience, you’ll be able to master the art of UV soldermask application and take your PCB manufacturing skills to the next level.
Happy soldering!


Leave a Reply