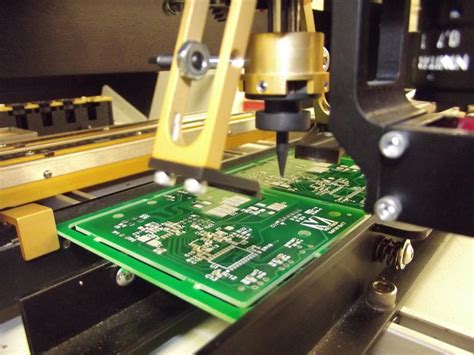
Introduction to PCB assembly
Printed Circuit Board (PCB) assembly is the process of soldering or mounting electronic components onto a PCB. It is a crucial step in the manufacturing of electronic devices, as it determines the functionality, reliability, and quality of the final product. In this article, we will discuss six essential points that we need to pay attention to in PCB assembly to ensure a successful outcome.
1. Component Selection and Placement
Choosing the Right Components
One of the most critical aspects of PCB assembly is selecting the appropriate components for the design. Factors to consider when choosing components include:
- Functionality
- Size and package type
- Thermal characteristics
- Power requirements
- Cost
It is essential to select components that meet the design specifications and are readily available from reliable suppliers.
Proper Component Placement
Proper component placement is crucial for ensuring the optimal performance and reliability of the assembled PCB. Some key considerations for component placement include:
- Grouping components based on their function
- Minimizing the distance between related components
- Avoiding placing sensitive components near sources of electromagnetic interference (EMI)
- Ensuring adequate spacing for heat dissipation
- Facilitating efficient assembly processes
By carefully planning the component placement, you can improve the manufacturability, testability, and overall quality of the PCB assembly.

2. Solder Paste Application
Solder Paste Selection
Solder paste is a mixture of tiny solder particles suspended in a flux medium. Selecting the appropriate solder paste is essential for achieving reliable solder joints. Factors to consider when choosing solder paste include:
- Alloy composition (e.g., tin-lead, lead-free)
- Particle size and shape
- Flux activity level
- Viscosity and printing properties
- Compatibility with the PCB surface finish and component metallization
Stencil Design and Printing
Solder paste is typically applied to the PCB using a stencil printing process. The stencil is a thin metal sheet with apertures that correspond to the solder pad locations on the PCB. Some key considerations for stencil design and printing include:
- Aperture size and shape
- Stencil thickness
- Alignment accuracy
- Printing parameters (e.g., pressure, speed, separation distance)
- Periodic stencil cleaning and maintenance
Proper stencil design and printing are essential for achieving consistent solder paste deposits and minimizing defects such as bridging, insufficients, or voids.

3. Reflow Soldering Process
Reflow Profile Development
Reflow soldering is a process in which the PCB assembly is heated in a controlled manner to melt the solder paste and form permanent solder joints. Developing an appropriate reflow profile is crucial for ensuring the quality and reliability of the solder joints. The reflow profile consists of several stages, including:
- Preheat: Gradually raising the temperature to activate the flux and evaporate solvents
- Soak: Maintaining a stable temperature to allow the components to reach thermal equilibrium
- Reflow: Rapidly heating the assembly above the solder’s melting point to form solder joints
- Cooling: Gradually lowering the temperature to solidify the solder joints
Factors to consider when developing a reflow profile include the solder paste characteristics, component thermal limitations, and PCB material properties.
Process Control and Monitoring
To ensure consistent and reliable reflow soldering results, it is essential to implement proper process control and monitoring. Some key aspects of process control and monitoring include:
- Temperature profiling using thermocouples or thermal cameras
- Monitoring conveyor speed and alignment
- Controlling the atmosphere inside the reflow oven (e.g., nitrogen for lead-free soldering)
- Regularly calibrating and maintaining the Reflow Equipment
- Implementing statistical process control (SPC) to detect and correct process variations
By closely monitoring and controlling the reflow soldering process, you can minimize defects, improve yields, and ensure the long-term reliability of the PCB assembly.

4. Inspection and Testing
Visual Inspection
After the reflow soldering process, it is important to perform a visual inspection of the PCB assembly to identify any obvious defects or issues. Some common defects to look for include:
- Solder bridges or shorts
- Insufficient or excessive solder
- Component misalignment or tombstoning
- Damaged or missing components
Visual inspection can be performed manually using magnification tools or automatically using machine vision systems.
Automated Optical Inspection (AOI)
Automated Optical Inspection (AOI) is a technology that uses cameras and image processing algorithms to detect defects on the PCB assembly. AOI systems can quickly and accurately identify a wide range of defects, including:
- Solder joint defects (e.g., bridging, insufficients, voids)
- Component placement errors
- Missing or incorrect components
- Polarity or orientation issues
AOI is particularly useful for high-volume production, as it can significantly reduce the time and cost associated with manual inspection.
Electrical Testing
Electrical testing is performed to verify the functionality and performance of the assembled PCB. There are several types of electrical tests, including:
- In-Circuit Testing (ICT): Verifies the presence, orientation, and value of individual components using a bed-of-nails fixture
- Flying Probe Testing: Uses moving probes to test the connectivity and functionality of the PCB without the need for a custom fixture
- Functional Testing: Verifies the overall functionality of the PCB assembly by simulating real-world operating conditions
Electrical testing helps to identify any defects or issues that may not be visible during visual inspection, ensuring the quality and reliability of the final product.
5. Rework and Repair
Rework Procedures
Despite best efforts to prevent defects, there may be instances where rework is necessary to correct issues identified during inspection or testing. Some common rework procedures include:
- Removing and replacing defective components
- Adding or removing solder to correct insufficient or excessive solder joints
- Cleaning or repairing damaged solder pads or traces
It is important to establish well-defined rework procedures and train operators to perform rework consistently and effectively.
Repair Documentation
When performing rework or repair on a PCB assembly, it is crucial to document the process thoroughly. Repair documentation should include:
- Description of the issue and its location on the PCB
- Steps taken to correct the issue
- Materials and tools used during the repair process
- Verification of the repair’s effectiveness through re-inspection or testing
Proper repair documentation helps to ensure traceability, facilitate root cause analysis, and improve overall process quality.
6. Quality Management System
Implementing a QMS
To consistently produce high-quality PCB assemblies, it is essential to implement a robust Quality Management System (QMS). A QMS is a set of policies, processes, and procedures that ensure the consistent adherence to quality standards throughout the manufacturing process. Some key elements of a QMS for PCB assembly include:
- Documented processes and work instructions
- Training and certification of operators
- Calibration and maintenance of equipment
- Incoming material inspection and vendor qualification
- Statistical process control and continuous improvement
By implementing a QMS, you can reduce variability, minimize defects, and continuously improve the quality and reliability of your PCB assemblies.
Quality Metrics and Reporting
To effectively monitor and improve the quality of your PCB assembly process, it is important to establish key quality metrics and regularly report on performance. Some common quality metrics for PCB assembly include:
- First Pass Yield (FPY): The percentage of PCB assemblies that pass all inspections and tests without requiring rework or repair
- Defects Per Million Opportunities (DPMO): The number of defects found per million opportunities, where an opportunity is defined as a chance for a defect to occur
- Rework Rate: The percentage of PCB assemblies that require rework or repair
- On-Time Delivery (OTD): The percentage of orders delivered to the customer on or before the promised delivery date
By tracking and reporting on these quality metrics, you can identify areas for improvement, set performance targets, and demonstrate your commitment to quality to your customers.
Frequently Asked Questions (FAQ)
1. What is the difference between through-hole and surface mount PCB assembly?
Through-hole PCB assembly involves inserting component leads through holes drilled in the PCB and soldering them on the opposite side. Surface mount PCB assembly, on the other hand, involves placing components directly onto solder pads on the surface of the PCB. Surface mount technology allows for smaller components and higher component density compared to through-hole.
2. What are some common PCB assembly defects?
Some common PCB assembly defects include:
- Solder bridges or shorts
- Insufficient or excessive solder
- Component misalignment or tombstoning
- Missing or incorrect components
- Cold solder joints
- Lifted or damaged solder pads
3. How can I reduce the risk of electrostatic discharge (ESD) damage during PCB assembly?
To reduce the risk of ESD damage during PCB assembly, you can:
- Use ESD-safe workstations, mats, and wrist straps
- Store and transport sensitive components in ESD-safe packaging
- Train operators on proper ESD handling procedures
- Maintain a humidity level of 40-60% in the assembly area to minimize static buildup
4. What is the purpose of a solder stencil in PCB assembly?
A solder stencil is a thin metal sheet with apertures that correspond to the solder pad locations on the PCB. The stencil is used to apply solder paste to the PCB in a precise and consistent manner. The aperture size and shape determine the amount of solder paste deposited on each pad, which is critical for forming reliable solder joints during the reflow soldering process.
5. How often should I perform maintenance on my PCB assembly equipment?
The frequency of maintenance on your PCB assembly equipment depends on several factors, including the type of equipment, usage levels, and environmental conditions. In general, it is recommended to:
- Perform daily cleaning and inspection of solder stencils, pick-and-place nozzles, and conveyor systems
- Conduct weekly calibration checks on pick-and-place machines, reflow ovens, and inspection systems
- Schedule annual or semi-annual preventive maintenance visits from equipment manufacturers or certified service providers
By following a regular maintenance schedule, you can ensure the optimal performance and longevity of your PCB assembly equipment, reducing unplanned downtime and improving overall process quality.
Conclusion
In conclusion, paying attention to these six critical points in PCB assembly – component selection and placement, solder paste application, reflow soldering process, inspection and testing, rework and repair, and quality management system – is essential for producing high-quality, reliable electronic products. By carefully considering each of these aspects and implementing best practices, you can minimize defects, improve yields, and exceed customer expectations in today’s competitive electronics manufacturing landscape.


Leave a Reply