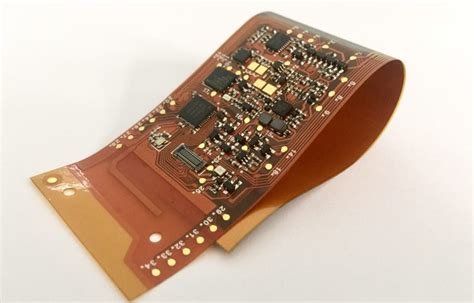
Designing a Rigid-Flex PCB
The first step in the rigid-flex PCB manufacturing process is the PCB design. Designing a rigid-flex PCB is more challenging than a typical rigid board and requires careful planning and attention to detail.
Use the Right CAD Tools
Make sure to use PCB design software that supports rigid-flex features. The CAD tools should be able to handle:
– 3D modeling of board outlines, folds, and bends
– Defining rigid and flex regions
– Adding stiffeners and coverlay
– Checking bend radii and flex zones
– Outputting all necessary fabrication files
Popular PCB design tools for rigid-flex include Altium Designer, Cadence Allegro, and Mentor Graphics Xpedition.
Follow Rigid-Flex Design Guidelines
There are many important design considerations and rules to follow when designing a rigid-flex PCB:
- Use the minimum number of flex layers possible (typically 1 or 2)
- Define clear boundaries between rigid and flex regions
- Provide adequate strain relief in flex areas
- Follow minimum bend radius and bend cycle specs
- Avoid putting vias or components near bend zones
- Use teardrops and curved traces to improve reliability
- Make sure copper features are properly supported
- Consider the sequence and direction of folds
- Document all requirements in the fabrication drawing
By understanding and adhering to rigid-flex design guidelines, you can help ensure your board is manufacturable and reliable.
Consider the Stack-Up
The stack-up is especially critical for rigid-flex PCBs. A typical rigid-flex stack-up consists of multiple rigid and flexible layers laminated together with bondply or adhesives. For example:
– Rigid cap layer (FR-4)
– Flex layer (polyimide)
– Rigid core layer(s)
– Flex layer
– Rigid cap layer
The number, type, and thickness of layers in the stack-up will depend on the design requirements. Work closely with your fabricator to define the optimal stack-up for your application.
Rigid-Flex PCB Materials
Selecting the right materials is critical for rigid-flex performance and reliability. Using materials that are not compatible or suited for the application can lead to issues like delamination or premature failure.
Flexible Substrates
The flexible portions of a rigid-flex PCB are typically made from polyimide (PI) film. PI is lightweight, strong, and can withstand high temperatures. Common PI films used in flex circuits include Kapton and Pyralux.
The key properties to consider when selecting a PI film include:
– Dielectric constant (Dk)
– Dissipation factor (Df)
– Tensile strength and elongation
– Moisture absorption
– Flammability rating
– Thickness (typically 1-5 mils)
Coverlay
Coverlay is a flexible solder mask material used to insulate and protect the outer layers of the flex region. It is usually made from polyimide with a b-staged acrylic adhesive. The coverlay is vacuum laminated and then photoimaged to reveal component pads and access holes.
Adhesives
Adhesives are used to bond the flex layers to adjacent rigid layers and also to provide insulation between conductors. The most common type of adhesive is acrylic. Epoxy and pressure-sensitive adhesives are also used.
The adhesive material must be able to withstand:
– High temperatures during assembly and operation
– Mechanical stress from bending and flexing
– Chemical exposure to solder mask, fluxes, and cleaning agents
Stiffeners
Stiffeners are used to selectively stiffen portions of the flex layers and provide extra support for components and connectors. They are typically made from FR-4, polyimide, or metal (such as stainless steel or aluminum).
Stiffeners are laminated to the flex using a separate adhesive layer. The type and thickness of the stiffener material depends on the design requirements.

Rigid-Flex Fabrication Process
The actual fabrication process for rigid-flex PCBs shares many similarities with standard rigid boards, but also requires some unique steps and methods. Here is an overview of the key steps involved:
Imaging
First the flexible and rigid material layers are cut to size. The inner layer circuits are then printed onto the individual substrates using photolithography. This involves:
1. Cleaning and coating the substrate with photoresist
2. Exposing the resist with UV light through a phototool
3. Developing to remove unexposed resist
4. Etching away unwanted copper
5. Stripping the remaining resist
Drilling
Next, any necessary holes are drilled into the substrates. Rigid-flex designs often use laser drills for smaller microvias and controlled-depth drilling. The hole walls are then cleaned and activated for plating.
Plating
The drilled holes are then plated with copper to form interconnects between layers. Additional copper is also plated onto traces and pads as needed. The outer layers then undergo a similar print and etch process to form the top and bottom circuit patterns.
Laminating
The flexible layers are then laminated together with the rigid cores and prepreg using heat and pressure in a vacuum press or autoclave. Adhesives are used to bond the different materials together. This is a critical step that requires precise control of temperature, pressure, and alignment to avoid issues like delamination or layer misregistration.
Routing
The rigid-flex panel is then routed out into individual circuits using CNC routers or laser cutting. V-score lines are added to define the flex regions and allow the board to bend.
Surface Finishes
The exposed copper pads are then coated with a protective surface finish, such as ENIG (immersion gold), HASL (solder), or OSP (organic solderability preservative). Solder mask is also applied to insulate the outer layers, with openings to access component pads and test points.
Electrical Test
Finally, the fabricated boards are electrically tested using flying probe or fixtureless in-circuit test (ICT) machines. This verifies the continuity and isolation of all the nets and helps catch any manufacturing defects. After testing, the boards are packaged and shipped to the customer.

Assembling Rigid-Flex PCBs
Once fabricated, the rigid-flex PCB must be assembled with components. The assembly process is similar to rigid boards but requires extra care and attention.
Paste Printing
Solder paste is printed onto the component pads through a metal stencil. The paste must be carefully printed to avoid smearing or scooping, especially on flexible areas.
Pick and Place
Surface mount components are then picked and placed onto the pads by automated machines. The rigid-flex PCB must be properly supported, usually with a custom vacuum fixture, to prevent warping or damage.
Reflow
The assembled PCB is then sent through a reflow oven to melt the solder paste and form permanent solder joints. The reflow profile must be carefully tuned to avoid overheating the flexible portions.
Inspection
After reflow, the assembled PCB is inspected for any defects, such as tombstoning, bridging, or insufficient solder. Automated optical inspection (AOI) is commonly used.
Additional Steps
Depending on the design, additional assembly steps may be required, such as hand soldering through-hole components, staking or underfilling chips, conformal coating, or mechanical assembly.

Advantages of Rigid-Flex PCBs
To summarize, rigid-flex PCBs offer many advantages compared to traditional rigid boards or separate rigid and flex circuits:
Space and Weight Savings
By combining multiple circuits into one assembly, rigid-flex PCBs can significantly reduce the size and weight of the end product. This is especially beneficial for compact and portable devices.
Improved Reliability
Rigid-flex PCBs eliminate the need for connectors and cables between rigid and flex sections. This improves reliability by reducing the number of potential failure points. Rigid-flex designs also have better resistance to shock and vibration.
Enhanced Electrical Performance
Rigid-flex PCBs can provide better signal integrity than separate circuits by reducing the number of interconnects and shortening the signal path. They also have better control of impedance and EMI.
Design Flexibility
The ability to bend and fold the PCB allows for more creative and efficient packaging designs. Rigid-flex can fit into tight spaces and be mounted in three dimensions, offering more design freedom.
Cost Reduction
Although the raw material and fabrication costs are higher for rigid-flex, the total system cost can be lower by eliminating connectors and cables, reducing assembly time, and improving yields. Rigid-flex can also reduce the number of individual PCBs and components needed.
Disadvantages of Rigid-Flex PCBs
While rigid-flex PCBs offer many benefits, there are also some potential drawbacks to consider:
Higher Material Costs
The raw material costs for rigid-flex are higher than standard rigid PCBs due to the specialized flexible substrates, adhesives, and stiffeners required. However, this cost can often be offset by the other system-level savings.
Longer Lead Times
Rigid-flex PCBs have longer fabrication cycle times than rigid boards due to the additional processes and challenges involved. This can impact project schedules and time-to-market.
Limited Supplier Options
Not all PCB fabricators have the capabilities to manufacture rigid-flex boards, so the supply base is more limited. This can also impact cost and lead times.
More Complex Design
Rigid-flex PCBs are more complex to design than standard rigid boards and require specialized knowledge and tools. Designers must carefully consider the unique materials, stack-up, and mechanical requirements.
Reduced Reworkability
Once assembled, rigid-flex PCBs are more difficult to rework or repair than rigid boards. The flexible sections are more delicate and sensitive to handling.
Frequently Asked Questions
What industries commonly use rigid-flex PCBs?
Rigid-flex PCBs are used in a variety of industries, including:
– Consumer electronics
– Medical devices
– Aerospace and defense
– Automotive
– Industrial equipment
– Wearables and IoT
Are rigid-flex PCBs more expensive than rigid boards?
The material and fabrication costs for rigid-flex PCBs are higher than standard rigid boards. However, the total system cost is often lower when you consider the eliminated components, improved reliability, and other benefits.
What is the typical turnaround time for a rigid-flex PCB?
Lead times for rigid-flex PCBs are longer than standard rigid boards, typically 3-5 weeks depending on the complexity and requirements. Expedited options may be available for an additional cost.
How long do rigid-flex PCBs last?
The lifespan of a rigid-flex PCB depends on many factors, including the materials, design, environment, and usage conditions. In general, a well-designed rigid-flex PCB can last over 10 years or millions of flex cycles.
Are rigid-flex PCBs repairable?
Rigid-flex PCBs are more difficult to rework and repair than standard rigid boards due to the delicate flexible regions and dense packaging. In many cases, it is more cost-effective to replace the entire assembly rather than attempt repairs.
Conclusion
In summary, rigid-flex PCBs offer a unique combination of benefits for many applications, but also require careful design, planning, and manufacturing to be successful. By understanding the key considerations and trade-offs involved in rigid-flex PCBs, you can make informed decisions about whether they are the right choice for your project.
When designed and fabricated properly, rigid-flex PCBs can enable significant improvements in reliability, performance, and packaging efficiency. As demands for smaller, lighter, and more integrated electronics continue to grow, rigid-flex will play an increasingly important role.
If you are considering using rigid-flex PCBs in your next project, be sure to work closely with an experienced design firm and fabricator to ensure the best possible results. With the right partners and approach, rigid-flex can help take your products to the next level.


Leave a Reply