Introduction to Hand-soldering techniques
Hand-soldering is a crucial skill in the electronics industry, allowing for the precise and reliable assembly of electronic components on printed circuit boards (PCBs). Two common hand-soldering techniques are point-by-point soldering and mini-Wave soldering. In this article, we will explore these techniques in detail, discussing their advantages, disadvantages, and best practices for achieving high-quality solder joints.
Point-by-Point Soldering
What is Point-by-Point Soldering?
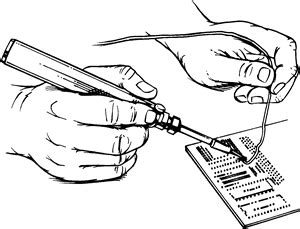
Point-by-point soldering, also known as touch-up soldering or manual soldering, is a technique where the soldering iron tip is used to heat and melt solder onto individual component leads and pads. This method allows for precise control over the soldering process and is often used for small-scale production, prototyping, or repair work.
Advantages of Point-by-Point Soldering
- Precision: Point-by-point soldering allows for accurate placement of solder on specific components and pads, making it ideal for delicate or densely populated PCBs.
- Flexibility: This technique can be used on a wide range of component types and sizes, as well as various PCB designs.
- Cost-effective: Point-by-point soldering requires minimal equipment and can be performed with a basic soldering iron, making it an affordable option for small-scale operations or hobbyists.
Disadvantages of Point-by-Point Soldering
- Time-consuming: Soldering each component individually can be a slow process, especially for larger PCBs or high-volume production.
- Operator dependent: The quality of solder joints heavily relies on the skill and experience of the operator, which can lead to inconsistencies in the final product.
- Fatigue: Prolonged periods of manual soldering can cause operator fatigue, potentially leading to errors or reduced productivity.
Best Practices for Point-by-Point Soldering
- Use the appropriate soldering iron tip size and shape for the component being soldered.
- Maintain a clean and well-tinned soldering iron tip to ensure efficient heat transfer and prevent oxidation.
- Apply solder to both the component lead and the PCB Pad to create a strong mechanical and electrical connection.
- Use flux to improve solder flow and prevent oxidation during the soldering process.
- Inspect solder joints for quality, ensuring they are shiny, smooth, and free of voids or excess solder.

Mini-Wave Soldering
What is Mini-Wave Soldering?
Mini-wave soldering is an automated soldering technique that uses a small, localized wave of molten solder to attach through-hole components to a PCB. The PCB is passed over a mini-wave fountain, allowing the solder to flow onto the component leads and pads, creating a strong and reliable connection.
Advantages of Mini-Wave Soldering
- Efficiency: Mini-wave soldering is faster than point-by-point soldering, as it can solder multiple components simultaneously, making it suitable for higher-volume production.
- Consistency: The automated nature of mini-wave soldering ensures consistent Solder Joint Quality, reducing the potential for human error.
- Reduced operator fatigue: Automated soldering minimizes the physical strain on operators, allowing for longer production runs without compromising quality.
Disadvantages of Mini-Wave Soldering
- Equipment cost: Mini-wave soldering machines can be expensive, making them less accessible for small-scale operations or hobbyists.
- Limited flexibility: Mini-wave soldering is best suited for through-hole components and may not be compatible with certain PCB designs or component types.
- Setup time: Configuring and optimizing a mini-wave soldering machine for a specific PCB design can be time-consuming, especially for small production runs or frequent design changes.
Best Practices for Mini-Wave Soldering
- Ensure proper PCB design, including appropriate pad sizes, hole diameters, and component spacing for optimal solder flow.
- Preheat the PCB to minimize thermal shock and improve solder joint quality.
- Adjust the mini-wave parameters, such as wave height, flow rate, and conveyor speed, to achieve the desired solder joint profile.
- Use a nitrogen atmosphere to reduce oxidation and improve solder joint appearance and reliability.
- Regularly maintain and calibrate the mini-wave soldering machine to ensure consistent performance and quality.

Comparison of Point-by-Point and Mini-Wave Soldering Techniques
| Aspect | Point-by-Point Soldering | Mini-Wave Soldering |
|---|---|---|
| Precision | High | Moderate |
| Flexibility | High | Limited |
| Cost-effectiveness | High for small-scale | High for large-scale |
| Speed | Slow | Fast |
| Consistency | Operator dependent | Automated |
| Operator fatigue | High | Low |
| Equipment cost | Low | High |

Frequently Asked Questions (FAQ)
-
Q: Which soldering technique is better for prototyping or small-scale production?
A: Point-by-point soldering is generally better suited for prototyping and small-scale production due to its flexibility, precision, and low equipment cost. -
Q: Can mini-wave soldering be used for surface-mount components?
A: Mini-wave soldering is primarily designed for through-hole components. While it can be used for some surface-mount components, it may not be the most suitable technique for SMD-heavy PCBs. -
Q: How can I improve the quality of my point-by-point solder joints?
A: To improve point-by-point solder joint quality, use the appropriate soldering iron tip, maintain a clean and well-tinned tip, apply solder to both the component lead and PCB pad, use flux, and inspect the joints for quality. -
Q: What are the key parameters to consider when setting up a mini-wave soldering machine?
A: Key parameters for mini-wave soldering include wave height, flow rate, conveyor speed, and preheat temperature. These parameters should be adjusted based on the specific PCB design and component requirements. -
Q: Can I use both point-by-point and mini-wave soldering techniques on the same PCB?
A: Yes, it is possible to use both techniques on the same PCB. Point-by-point soldering can be used for components that are not compatible with mini-wave soldering or for touch-up work after the mini-wave soldering process.
Conclusion
Understanding the differences between point-by-point and mini-wave soldering techniques is essential for achieving high-quality solder joints in electronic assemblies. Point-by-point soldering offers precision and flexibility, making it ideal for small-scale production or repair work, while mini-wave soldering provides efficiency and consistency for higher-volume production.
By following best practices and considering the advantages and disadvantages of each technique, electronics manufacturers and hobbyists can select the most appropriate soldering method for their specific needs. Whether using point-by-point or mini-wave soldering, the goal remains the same: to create strong, reliable, and high-quality solder joints that ensure the long-term performance and reliability of electronic devices.


Leave a Reply