
| Illustrative quote | Setup | Unit price | 10 accepted pieces | 100 accepted pieces |
|---|---|---|---|---|
| A | $300 | $25 | $550 | $2,800 |
| B | $100 | $40 | $500 | $4,100 |
A useful quotation starts with a defined deliverable
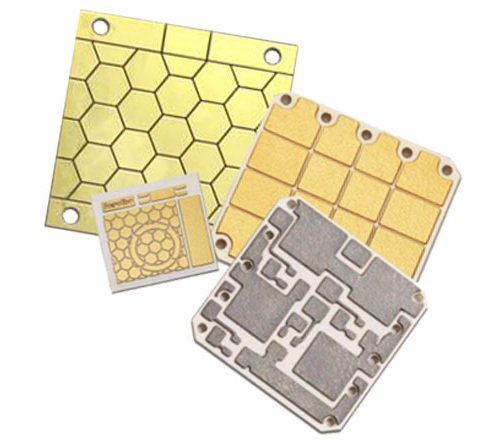
A ceramic PCB prototype quotation should describe the part that will arrive, not only the circuit that the designer intends to build. A bare ceramic blank, patterned substrate, finished metallized carrier and populated assembly require different work and different acceptance evidence. State the delivery condition before requesting prices. Identify whether the prototype is intended to test circuit function, prove assembly compatibility or qualify a production process. Those purposes may justify different inspection and documentation, but they should not be left for the supplier to guess. The specification guide provides the overall structure. This article turns that structure into a release package that purchasing, fabrication and assembly can interpret consistently.
Choose the process family before comparing feature claims
The label ceramic PCB includes constructions with substantially different manufacturing routes. Copper bonded to a ceramic, a plated thin-film pattern and a fired thick-film circuit should not inherit the same artwork rules simply because they share a substrate material. Rogers' substrate overview distinguishes bonded-copper approaches, while Kyocera describes printed and thin-film wiring routes. Use the relevant process description to frame the quotation, then ask the supplier to confirm which route it is offering. If the process remains an open engineering choice, request separately identified alternatives with their own stack-ups and exceptions. A single blended quotation can hide differences in conductor thickness, pattern capability or attachment compatibility that matter more than the initial price.
Name the material grade and its acceptance basis
Specify the ceramic by a controlled grade or by a set of agreed requirements that the supplier can actually certify. A generic material name and a conductivity copied from an unrelated data sheet do not establish the purchased product. Include nominal thickness, allowed thickness variation, outline and any surface preparation needed by subsequent processing. Distinguish typical reference properties from acceptance values. If an alternative grade is permitted, identify which functional properties and assembly trials govern approval. Do not require every property in a marketing comparison table to be measured on every prototype unless that evidence is necessary and obtainable. The goal is a specification connected to the design need, with a practical method for confirming that the delivered material meets it.
Describe every layer without conflating thicknesses
Provide a cross-section that separates ceramic thickness, conductor thickness and the surface-finish stack. If both faces carry metal, identify the thickness and function of each face. Clarify whether a quoted overall thickness includes metal and finish, and which dimensions are inspected independently. A drawing that calls out one overall dimension cannot always establish the individual layers needed by the electrical or thermal design. The stack-up guide helps keep those definitions together. Where patterned dielectric or resistor layers are included, label their sequence and purpose. Avoid treating a finish thickness as additional bulk copper or assuming that every metal layer is electrically connected to the one beneath it.
Define the finished copper edge rather than only the artwork
Etched metal has a physical profile, and different measurement planes can produce different widths. Remtec's DBC rules explicitly identify the ceramic-to-copper interface as the default measurement plane for its copper features unless otherwise noted. That is a supplier-specific convention worth resolving in an RFQ, not a universal convention to assume elsewhere. Mark the plane relevant to a landing pad, current-carrying neck or gap. Keep the required finished dimension separate from any production artwork compensation. The trace and space guide provides context, but the approved quotation and drawing must establish what will be inspected. Ask the supplier to flag any conflict between its convention and the functional surface used by your assembly.
Attach a datum scheme that serves the assembly
Choose datums that can be located on the actual delivered part and that correspond to the assembly fixture. Identify the orientation of top and bottom views so that registration requirements cannot be mistaken for mirrored artwork. Dimension holes, cutouts, critical pads and mounting features from that scheme rather than chaining every location through a sequence of tolerances. Include the relationship between the conductor pattern and the ceramic outline when it matters. A board may meet its outline dimension while a critical pad is displaced relative to a mounting hole. If the assembler locates on holes rather than edges, make that relationship clear. Precision is useful when it controls a functional relationship, not merely when a drawing contains many decimal places.
Worked example: a simple landing-area tolerance budget
Suppose a hypothetical terminal has a maximum width of 2.04 millimeters and the minimum usable finished pad width is 2.30 millimeters. A centered part would have 0.13 millimeters of nominal worst-case side allowance based on those limiting widths. If lateral placement error can be 0.08 millimeters, the limiting side retains 0.05 millimeters. This arithmetic does not establish whether that border is adequate for soldering, bonding or another attachment process. The assembly owner must define the required border and account for rotation and the orthogonal direction. The example illustrates why a supplier's pad-width tolerance and an assembler's placement capability must be evaluated together rather than accepted as unrelated entries on different drawings.
Specify holes and edges by their required function
Identify whether each opening is for fastening, alignment, fluid access, an electrical connection or another purpose. A hole diameter alone does not define its positional relationship to the circuit or the condition needed at its edge. For metallized or filled features, provide a section and identify connectivity to the surface conductors. For singulated edges, describe the acceptance method for damage that could interfere with assembly or insulation geometry. Avoid choosing a universal edge-chip limit without reference to the part and process. Ask the supplier to describe the inspection and any limitations around corners, narrow bridges or closely spaced openings. Keep noncritical cosmetic concerns separate from defects that threaten the required function.
Make surface finish compatible with the intended attachment
Name the required finish on each functional area and identify the joining operation it must support. A surface used for wire bonding, solder attachment or conductive adhesive may have different requirements. Specify selective regions where necessary and show whether an exposed base metal is acceptable elsewhere. Do not assume that a finish described as gold provides a particular bondability or thickness. Ask the supplier to confirm the actual stack and the relevant process evidence. If the prototype will undergo more than one thermal or attachment step, include that sequence in the review. A finish that works in an isolated trial may not behave identically after a different assembly history or storage interval.
Agree the inspection report before placing the order
List the dimensions and properties that must be reported, along with the method or reference procedure where it affects interpretation. Decide whether the prototype order requires a first-article dimensional report, electrical continuity and isolation checks, material certification or an assembly trial. Do not confuse a supplier's process-control measurement with inspection of the actual delivered parts. Where destructive sections are requested, state whether they consume saleable units or dedicated samples and identify the locations of interest. A report should reference the drawing revision and specimen identification. This makes an unexpected result actionable because the team can determine which requirement, part and measurement produced it rather than debating an unlabeled photograph.
Compare quotations using total accepted deliverables
Consider two invented quotations for ten accepted bare substrates. Supplier A proposes a setup charge of three hundred dollars and twenty-five dollars per piece, for a total of five hundred fifty dollars. Supplier B proposes a setup charge of one hundred dollars and forty dollars per piece, for a total of five hundred dollars. At one hundred pieces with the same assumed pricing, the totals would instead be two thousand eight hundred and four thousand one hundred dollars. These figures are purely illustrative and exclude freight, taxes and additional services. They show why prototype and follow-on quantities can favor different offers. Compare identical inspection, finish, revision and accepted quantities before concluding that the lower unit price represents the lower project cost.
Separate tooling ownership from revision responsibility
Ask which nonrecurring items are included, such as screens, masks, fixtures or inspection programming, and which changes would require them to be revised. State whether an engineering change is allowed after approval and how its effect on cost and timing will be reviewed. A design file sent by email after purchase should not silently replace the approved fabrication package. Give every release a clear revision and include a file manifest so that the supplier can acknowledge the exact data received. Where the supplier creates compensated production artwork, retain a link between that version and the customer drawing. This preserves the required finished geometry even when manufacturing data are not identical to the original circuit layout.
Ask for explicit exceptions instead of implicit assumptions
Provide a place for the supplier to list deviations, alternative materials and unverified capabilities. A quotation that simply says compliant can be difficult to evaluate if the drawing contains ambiguous or conflicting requirements. Resolve exceptions before treating the price as firm for the intended part. If a particular feature is a development challenge, identify the proposed trial and the acceptance decision that follows it. Avoid interpreting willingness to attempt a prototype as proof of stable production yield. The DFM checklist can structure the review, but it does not replace the supplier's written response to the specific construction. An acknowledged exception is easier to manage than an optimistic assumption hidden in an otherwise complete package.
Keep prototype acceptance distinct from production qualification
A successful prototype can establish that a particular assembly works under its test conditions. It does not automatically establish production capability, long-term reliability or interchangeability between suppliers. State what the prototype is intended to demonstrate and which later evaluations remain. Preserve unsuccessful units and their disposition when they help explain process limits, rather than reporting only the best-performing sample. If the prototype process differs from the proposed production process, identify that difference in the review. Changes in panel format, inspection coverage or assembly handling can matter even when the drawing remains the same. The purchase record should support the next engineering decision without overstating the confidence provided by a small initial lot.
Release one consistent package and one clear response
Before sending the RFQ, check that the drawing, conductor files, cross-section, quantities and acceptance notes all refer to the same revision and units. Include the intended delivery state and the attachments needed to quote any assembly work. Use the RFQ brief builder to organize the request and the cost guide to identify missing cost drivers. Ask for a response that separates recurring price, nonrecurring work, exclusions, lead-time assumptions and technical exceptions. Do not ask the supplier to infer a critical requirement from an image filename or a previous informal discussion. A complete prototype drawing is valuable because it reduces interpretation differences before they become physical parts.
Engineering example
Hypothetical landing margin: (2.30 − 2.04)/2 − 0.08 = 0.05 mm. Quote examples are invented arithmetic, not current supplier pricing or an attachment recommendation.
Before you release the design
- Identify the exact delivered state and process route.
- Define material, layer thicknesses, finished dimensions and datums.
- Connect finish and pad tolerances to the assembly process.
- Agree acceptance evidence, exceptions and revision control.
- Compare total price for the same accepted deliverables.
Sources and further technical reading
Manufacturer references support the material and process context. Worked examples and checklists are engineering guidance; they are not test results or supplier guarantees.